
With MyVRSpot's Video Response System, you can create assignments made up of a series of prompts, to which your students can respond. Each prompt you create can have an associated media item for students to view. Students can then respond in a variety of ways: text, video, audio, image, and more! Read on for some helpful tips to get you started!
Create an Assignment
Step 1: Login to your MyVRSpot account and click VRS > Create Assignment.
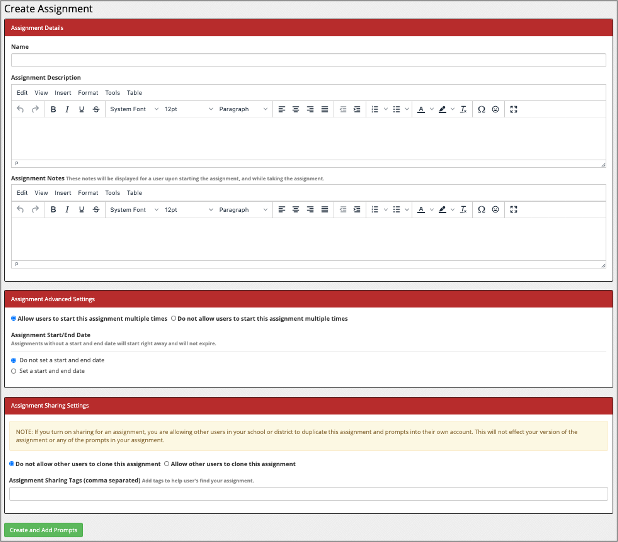
Step 2: Fill in the Assignment Details fields.
- Give your assignment a name
- Give your assignment a description (appears before starting the quiz)
- Add any assignment notes (viewable on any prompt for students - rubric, vocab list, etc.)
Step 3: Select your Assignment Advanced Settings:
- Do not/allow users to start this assignment multiple times.
- If you’d like, set a start/end date.
Step 4: Select your Assignment Sharing Settings:
- Do not/allow users to clone your assignment. If you do allow other users to clone your assignment, you can use the empty field to add in as many Tags as you’d like.
Step 5: Click the green Create and Add Prompts button.
Add Prompts
Continuing from the steps above, you’ll now see a screen where you can Add or Remove Prompts. You can either Add a New Prompt or you can Add an Existing Prompt. If you want to Add an Existing Prompt, you can select from prompts you have already created or used on other assignments.
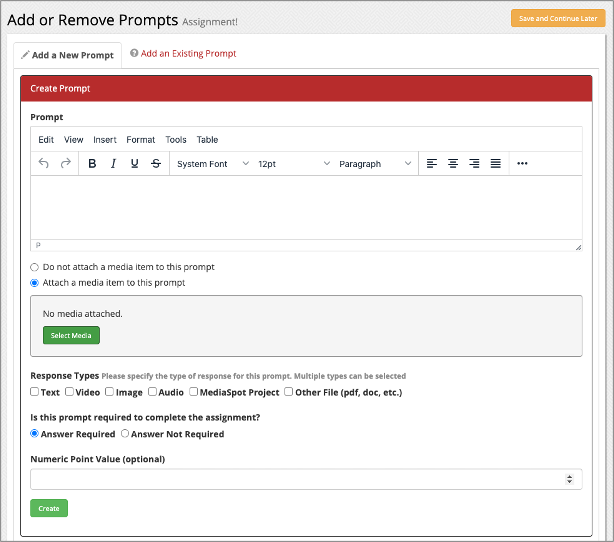
If you choose to Add a New Prompt then you can start by typing your first prompt into the text editor. You can then select whether or not you want to attach a media item to the prompt. If you select the radio button to attach a media item then a green Select Media button will appear. Click on the green Select Media button to attach a piece of media to your prompt (video, audio file, image, document, etc.).
Next, you will need to specify the type of responses you would like from your students. You can select more than one if you prefer. This allows your students to respond in a variety of ways, such as: Text, Video, Image, Audio, MediaSpot Project, or Other File (pdf, doc, etc.).
*Note that students can only respond to each prompt in one way, even when they have more than one option.
The last two items you must specify is whether or not the prompt is required to complete the VRS assignment and whether you would like to assign a Numeric Point Value to the prompt.
Finally, click the green Create button. Add as many Prompts as you’d like and when you are finished, you can select the yellow Save and Continue Later button or the green Publish Assignment button.
Assignment Prompt Features
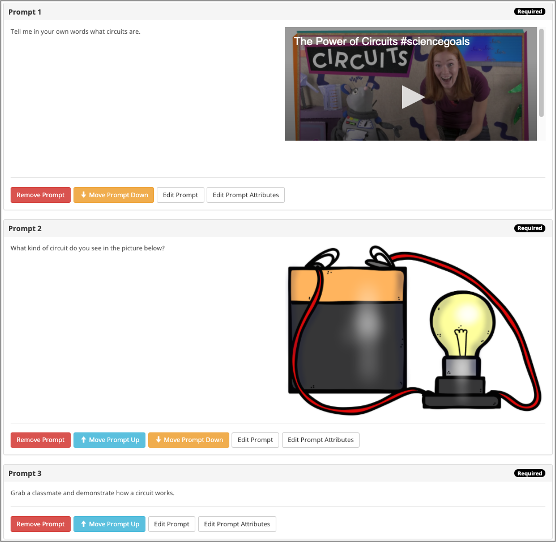
You can review and adjust your Assignment under the Existing Prompts section underneath the area where you created your prompts. From this section, you can do the following:
- View the total number of prompts
- Remove prompts
- Adjust the order of the prompts
- Edit the prompts
- Edit the prompt attributes (Answered required/not required and point value)
Share your Assignment
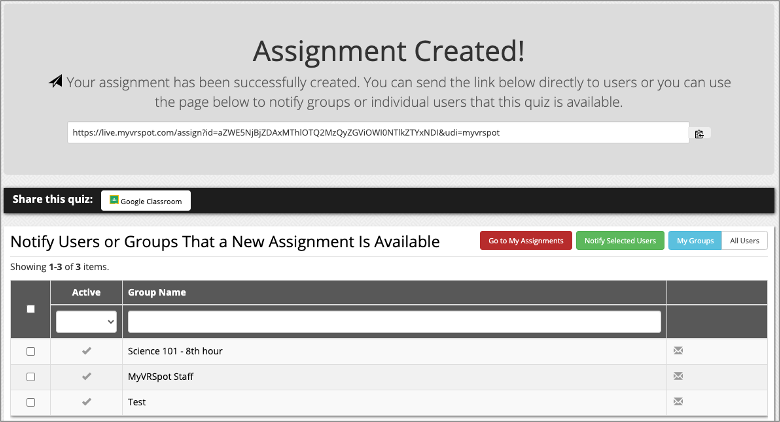
After you click the green “Publish Assignment” button, now you can share the assignment with your students or audience. You can share any of your assignments by logging into your MyVRSpot account and clicking VRS > My Created Assignments > the notify users (bullhorn) icon to the right of the assignment you want to share. Here are a few options for sharing your assignment:
- Share the URL: Copy and paste the URL and share it in an email, website, or LMS platform.
- Notify individual users: There are three methods of notifying individual users. First, you can email your group the unique URL for the assignment, which is located under the “Assignment Created!” notification. Or, click the white “All Users” button, which will list all users. Check the checkboxes to the left of the users’ names and then click the green “Notify Selected Users” button. Or, finally, click the mail icon to the right of the users’ names and they will be notified.
- Google Classroom: Under the “Assignment Created!” notification, there will be the Google Classroom button. Click this button, login to your Google account, allow access, and select the class in the dropdown.
- Notify groups: To notify multiple groups, check the checkboxes to the left of the group names, and then click the “Notified Selected Users” button. Alternatively, click the mail icons to the right of the group names.