

Older Stylus Pens
(585, 595 models)
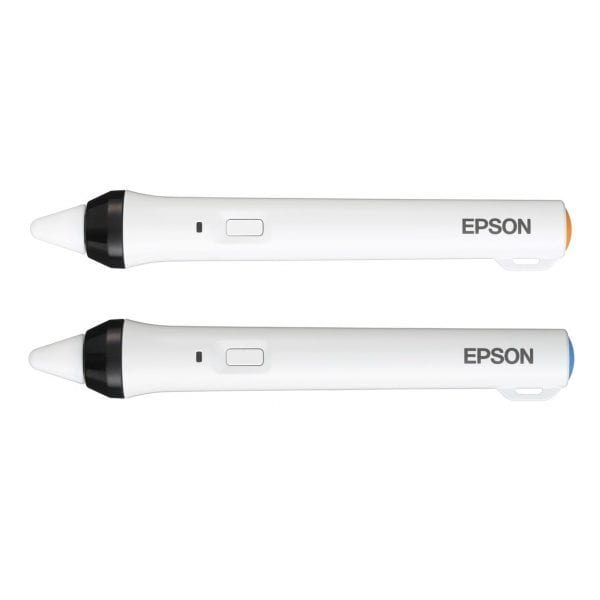
Newer Stylus Pens
(600 Series)
Instructional Technology
Epson Brightlink Projector Introduction
Brief Overview of Epson 600 Series Projectors
THIS PROJECTOR HAS BUILT IN TOOLS THAT ALLOW YOU TO ANNOTATE AND INTERACT WITHOUT A CONNECTING A COMPUTER!
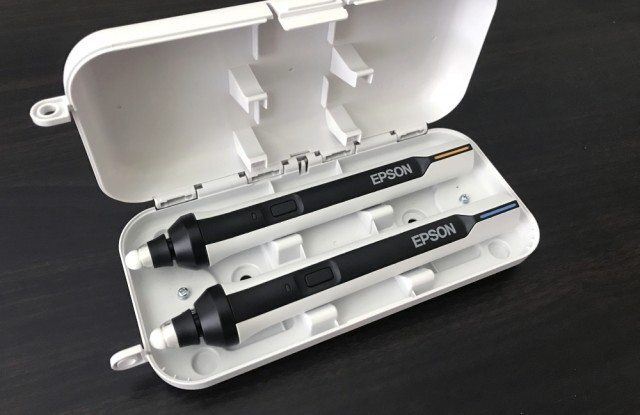
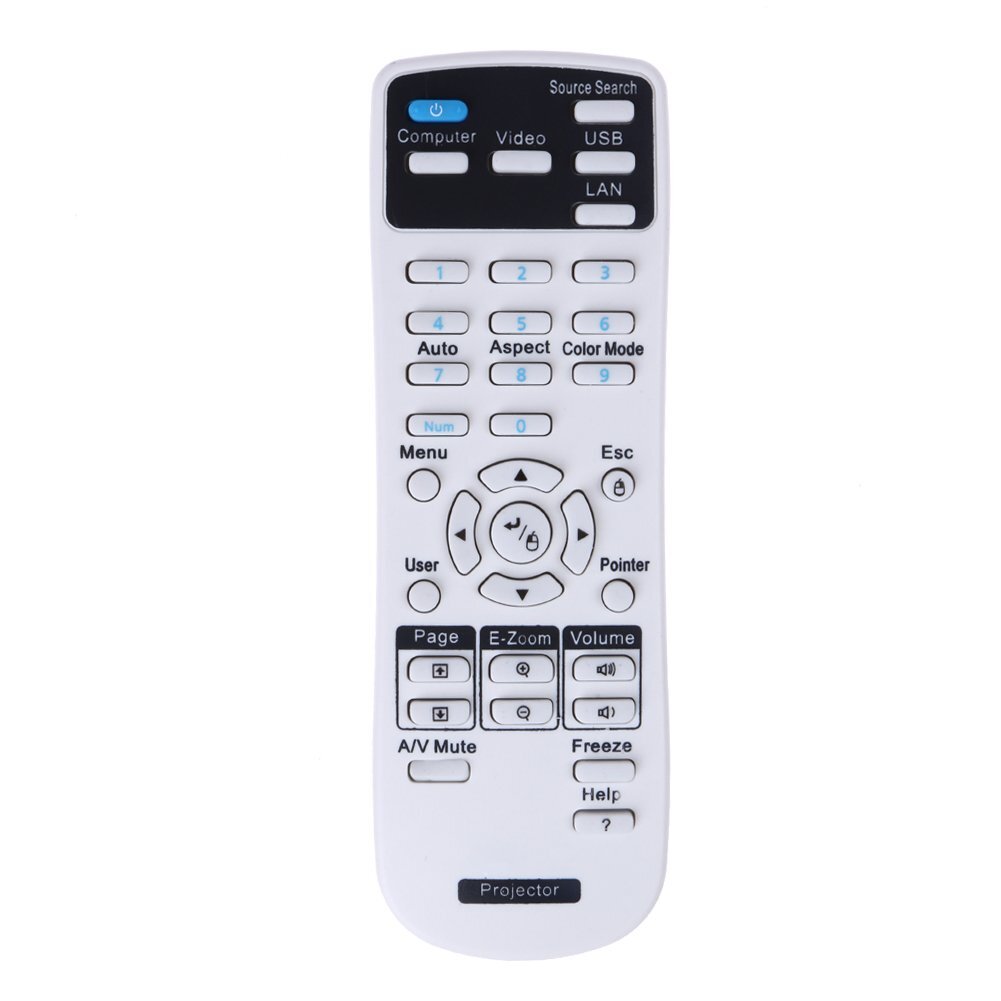
Using the Stylus Pens
PC FREE ANNOTATION
Connecting Your Computer
AVAILABLE CONNECTIONS ON PROJECTOR
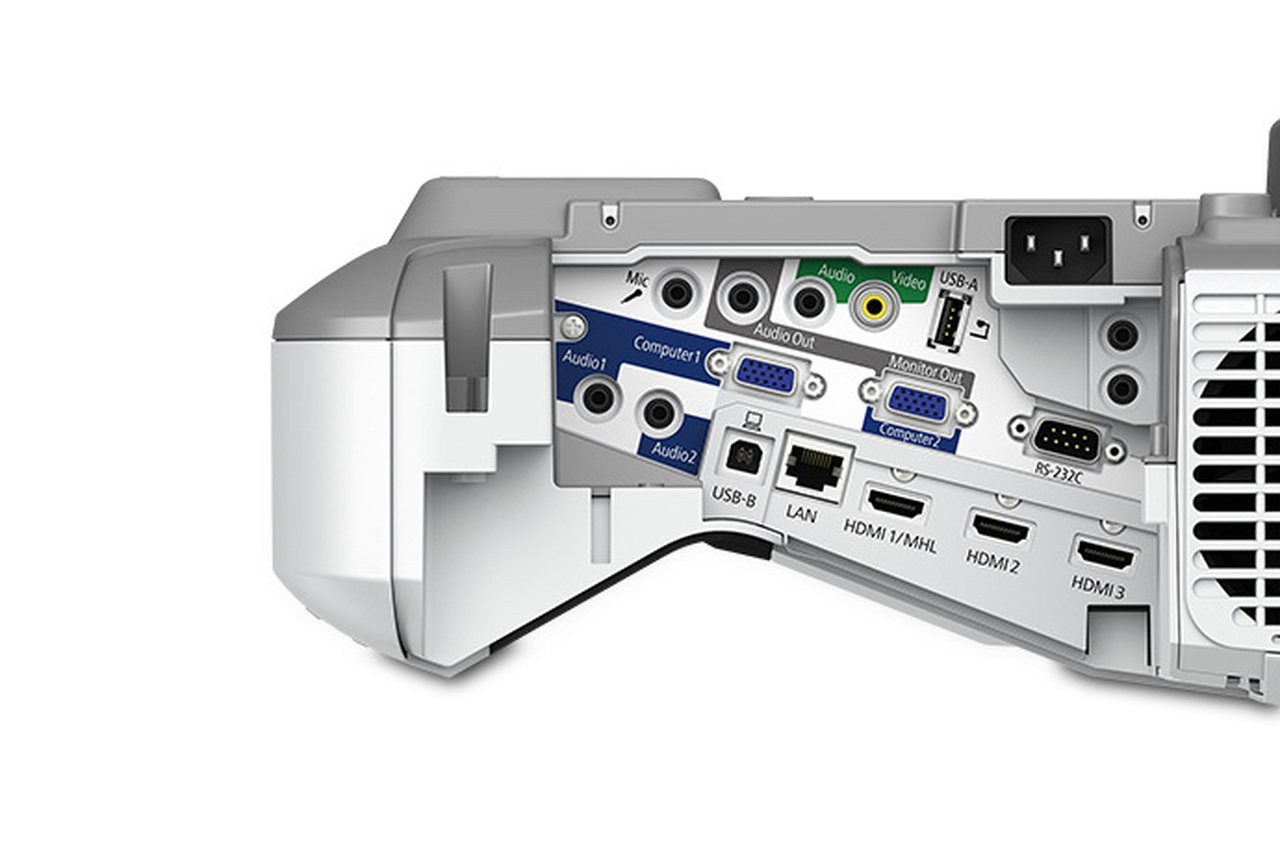
There are 2 screws holding a cover over these ports on the right side of your projector. All of the connection ports are here. Your cables should already be plugged into the correct ports on the projector. The only thing you have to do is match the cables to the ports on your computer. Some people connect multiple devices to the projector and use the source button to switch between them all. For example, you might have a DVD player connected to the projector's HDMI 1 port, your computer connected to a VGA port under the Computer 1 section of the port area, and a document camera plugged into the HDMI 2 port on the projector. By using the remote, one can choose which device to show on the projected screen under the Source section at the top part of your remote.
BE CAREFUL. NOT ALL CABLES ARE SUPPOSED TO BE PLUGGED IN!!
DISPLAY PORTS ON YOUR COMPUTER
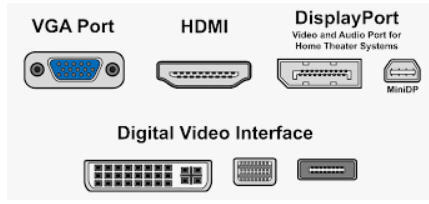
These are the ports on the back of your computer. Your computer may or may not have all of these ports. USB port is not pictured because typically, everyone who uses a computer uses a USB port at some point. The Epson projector does have the capability of displaying video and audio from your computer to the projector if the USB Display driver is installed on your computer and the projector settings are changed to accommodate USB Display mode. The VGA port carries ONLY a video signal from your computer to the projector. To have audio play through the projector, you will also need an audio cable of an appropriate length to connect from your computer's headphone port to the projector. Mini Display Ports are usually on Macbooks and usually carry both video and audio from the computer to the projector. The Digital Video Interface or DVI port carries only video from the computer to the monitor so you don't need a splitter if connected in this manner.
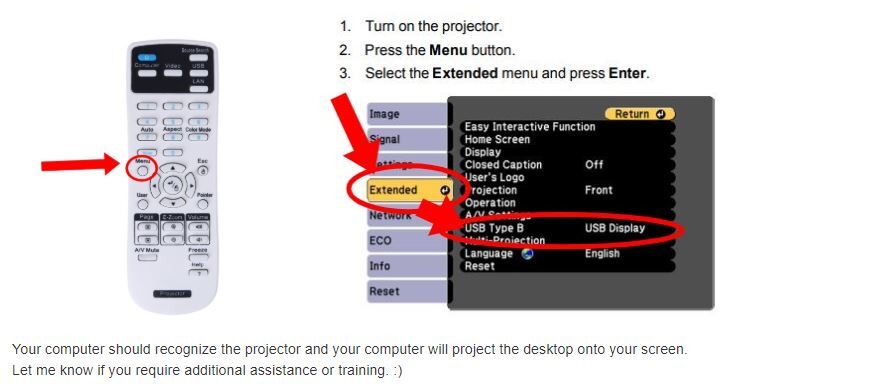
USB DISPLAY MODE
If you do not have HDMI or VGA cables, you can use the USB cable to project. First you have to use your remote to change the settings. Power on the projector. Press Menu on the remote. Select the Extended menu on the left of the screen that appears. Choose USB Type B and change it to USB Display.
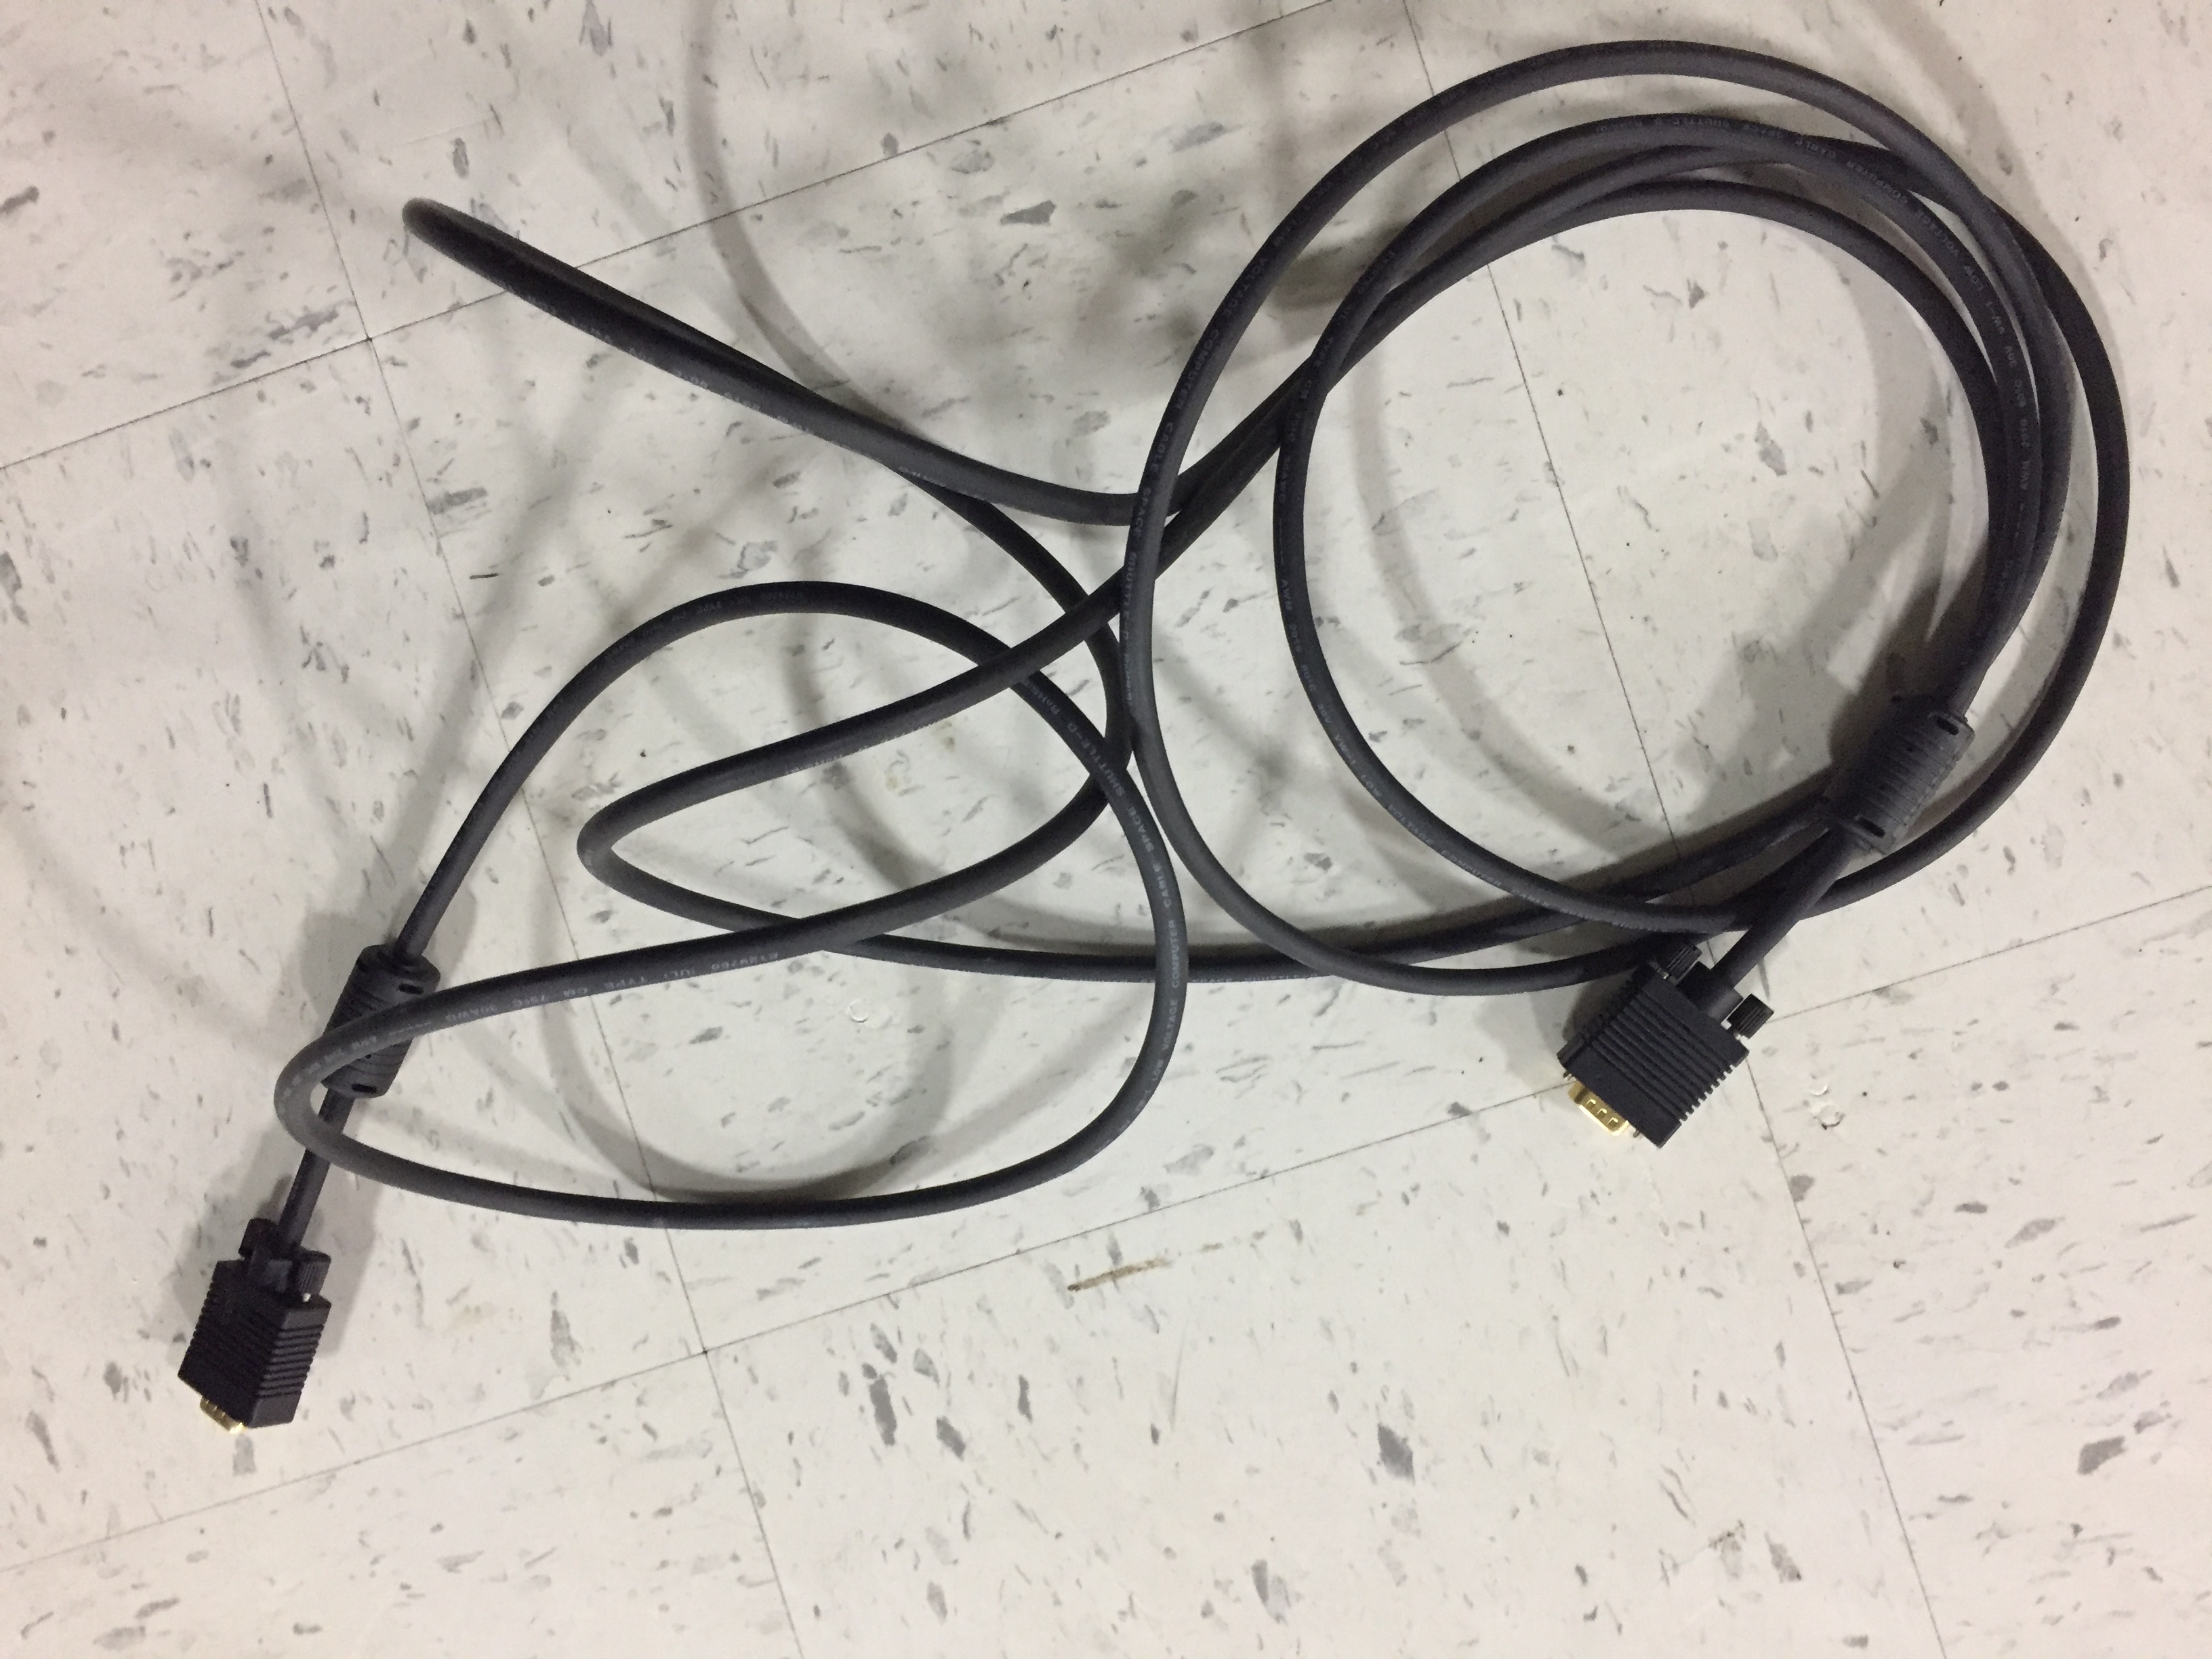
BE CAREFUL WITH YOUR CABLES!
Cable Management is SUPER IMPORTANT! If you damage the pins on a VGA cable, or bend the housing on an HDMI cable, you will loose projection capability until that cable is replaced.
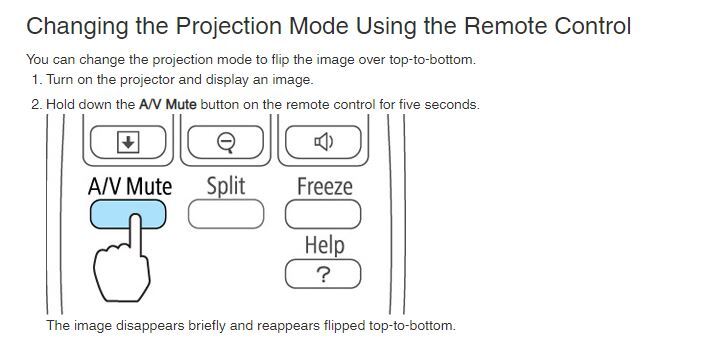
FLIPPING THE PROJECTED IMAGE USING YOUR REMOTE
Calibration
When the pen isn't writing correctly, the first thing to do is to make sure there is a good charge. Check this by pressing down the button on your stylus pen.
If the indicator light is green, your pen is charged. If it doesn't light up, remove and replace the batteries with a new or newly charged set.
Using your remote, press the User button to Auto Calibrate your projector image.
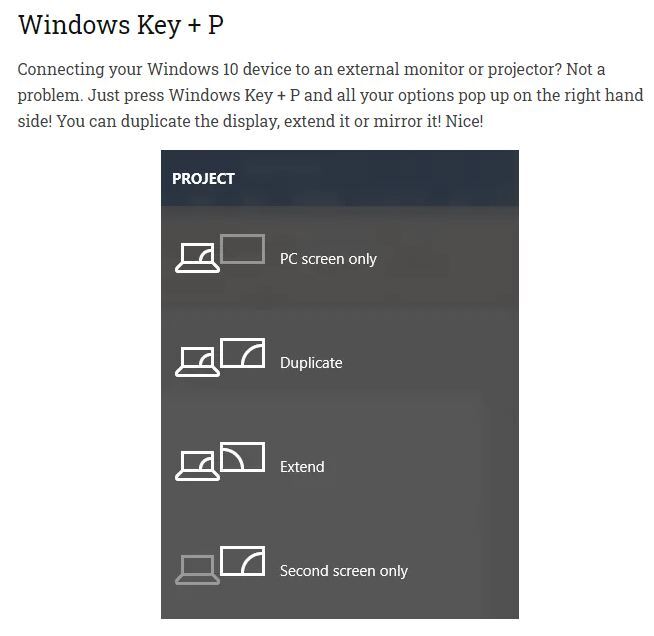
TO EXTEND OR NOT TO EXTEND...
Once you get everything connected, you will most likely see a Windows screen without any Desktop Shortcuts on the projected screen. Most people immediately think something is wrong, but actually your computer has detected a second display (your projector) and placed your Display Method as Extended Desktop Display. To make it where the projected image is the exact same as what you see on your computer monitor, follow the steps above and select "DUPLICATE". Extended Display is pretty cool though. You can drag windows from your computer monitor over to the projected image since it's acting like an extension of what you see on the monitor.
USING THE EPSON BRIGHTLINK TOOLS SOFTWARE
If you do not see the icon pictured below on your computer desktop, submit a help ticket for Software Installation.
Epson Manuals

If you require additional assistance with your new projector, please put in a
HELP TICKET
and request Training so a Classroom Tech Coach can assist you!
Download Epson Brightlink manual below.
Download Easy Interactive Tools Software Manual below.
(c) 2019 Shelby Elmore Desoto County Schools Instructional Technology
All manuals and videos were owned and created by Epson America and were used with permission to create this resource for teachers in the Desoto County School District, Hernando, Mississippi.